
A blank dorm wall makes even a fully moved-in room feel unfinished. Filling it doesn’t require a big spending spree. With a few dollars and an hour or two, you can turn craft supplies you already have, or ones from a dollar store run, into wall art that actually looks like it came from a store.
Every project below costs under $15 to make, most use scrap materials or dollar store finds, and each one comes down clean at the end of the semester. No drilling, no nails, and no surprise charges on your move-out bill.
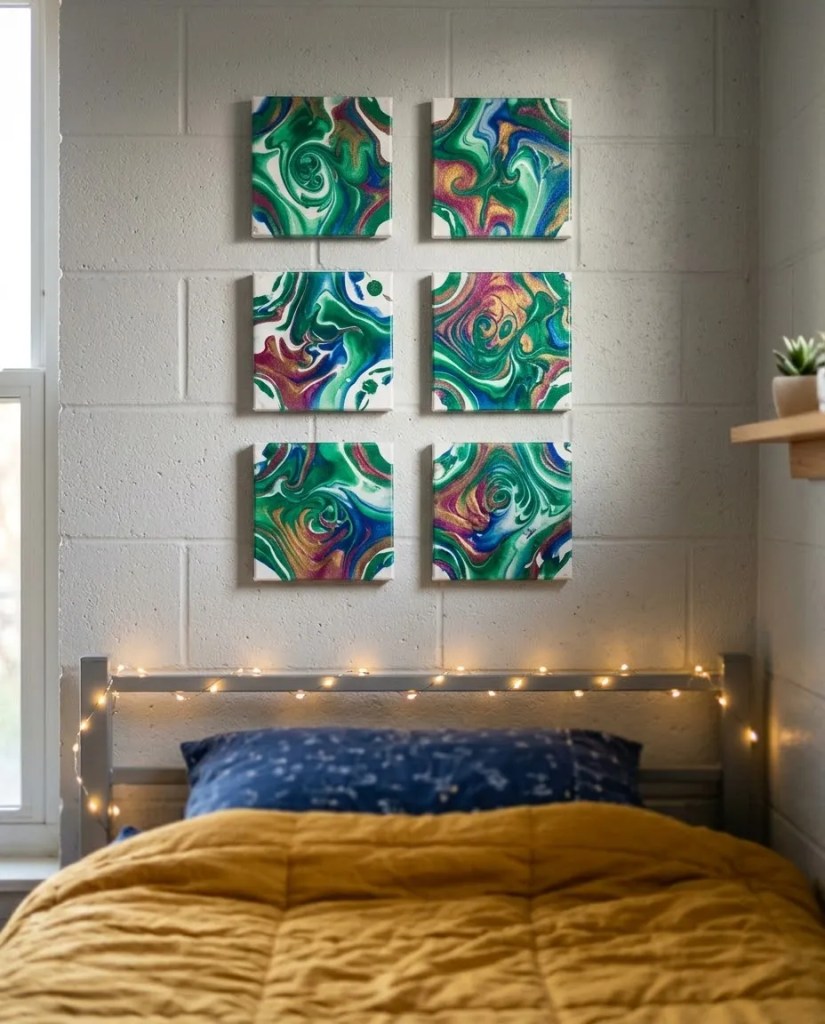
1. Marble Mini Canvases With Leftover Nail Polish
A cluster of small marbled canvases turns a bare stretch of wall into a mini gallery. The swirled colors look painted by hand because they are, and no two canvases ever come out the same.
Fill a disposable container with room-temperature water, then drop two or three colors of nail polish onto the surface. Swirl the colors with a toothpick to form a marbled pattern, dip a 4×4 inch canvas panel face-down into the water, and lift it straight out. Let it dry flat for 24 hours before handling. A six-pack of mini canvas panels runs about $4 to $6 at most craft stores, and the polish is often something already sitting unused in a drawer.
Each dried canvas weighs only a few ounces, so a single small adhesive picture-hanging strip rated for 1 pound holds it without strain. Arrange four to six canvases in a grid with two inches of space between each one, and the light weight makes this one of the safest options for cinder block dorm walls, where heavier items tend to slip.
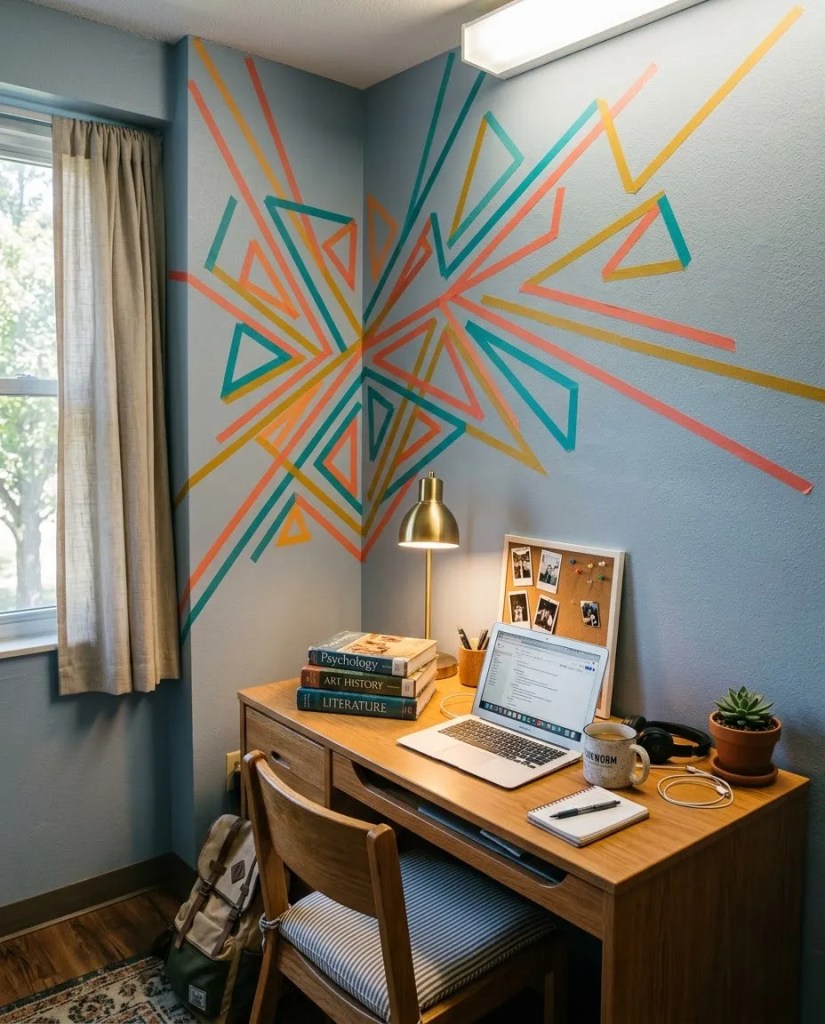
2. Tape a Geometric Line Mural Straight Onto the Wall
Instead of hanging anything, this idea puts the art directly on the wall using colored tape. Angular lines radiating from one corner, or a cluster of overlapping triangles, can cover several feet of wall space without a single hole.
Measure the wall section first, then pick two or three tape colors that work together. Mark your layout lightly in pencil, since graphite wipes off painted drywall, then lay the tape lines using scissors for clean, straight cuts. Press each strip firmly along its full length so the edges seal down and don’t lift over time.
Washi tape is the safer choice here over masking or duct tape, since it pulls away cleanly even from painted cinder block without taking chips of paint with it. Test a short strip in a hidden corner first to confirm it releases cleanly, and check your dorm’s decorating policy before applying tape directly to a painted wall since some housing offices restrict it even when it’s removable.
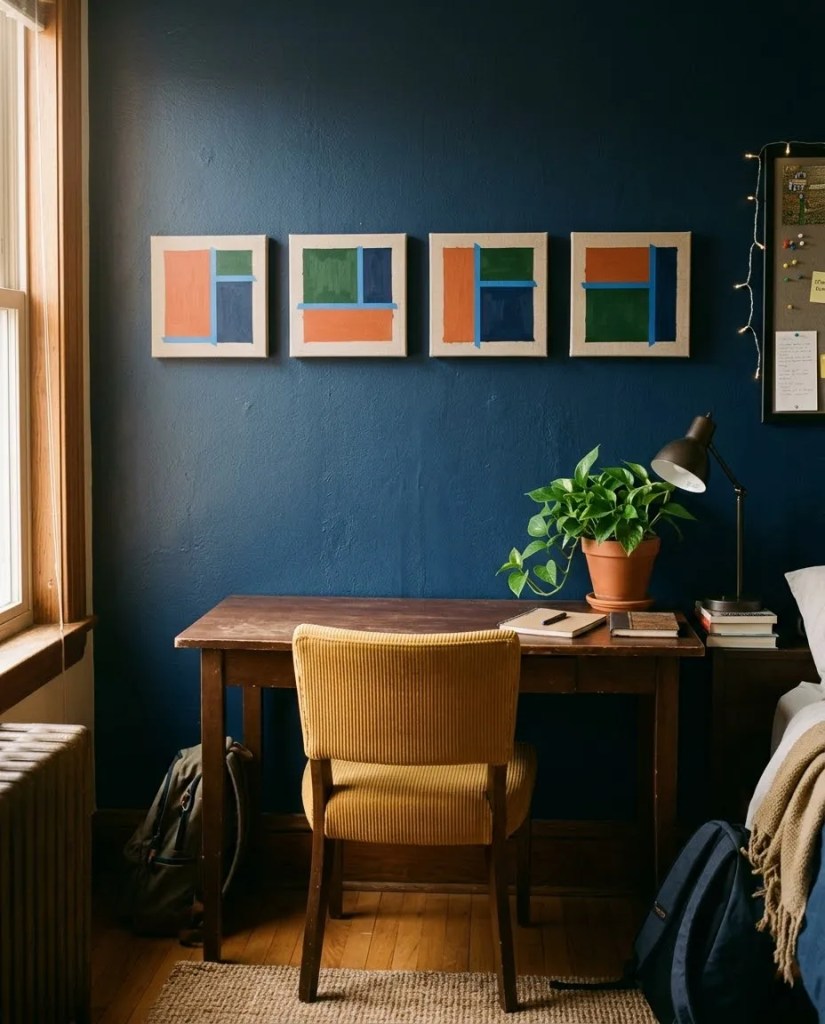
3. Turn Paint Sample Pots Into an Abstract Canvas Set
Paint sample pots, usually $3 to $6 each at any hardware store, cover far more canvas than their small size suggests. Painting three or four canvases in blocks of color from the same palette turns them into a coordinated set instead of a handful of mismatched squares.
Choose a palette of colors that share an undertone, then paint a base coat and let it dry for about an hour. Use painter’s tape to mask off geometric shapes or clean lines, paint the second layer, and peel the tape away once the paint is dry to the touch. Let each canvas cure fully for a day before hanging.
Canvases with a wood backing stay light, but anything larger than 8×10 inches benefits from adhesive strips rated for 3 pounds rather than a single small strip. Mark the hanging line with painter’s tape instead of pencil so there’s nothing left to erase once the set comes down.
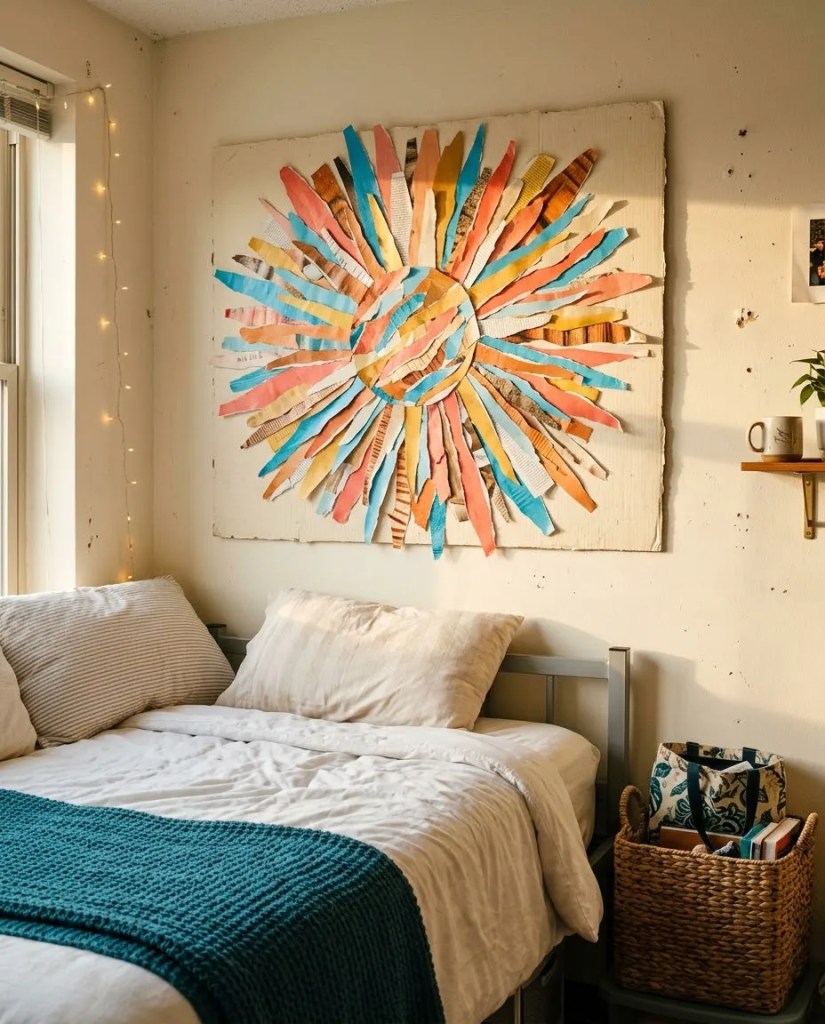
4. Cut Old Magazine Pages Into a Paper Collage
A collage built from magazine pages costs close to nothing if the magazines are already sitting in a recycling bin or free stack at a library. Cutting and layering pages into a shape or scene turns pages headed for the trash into a full piece of wall art.
Pick a shape, word, or loose scene to build toward, then cut pieces that fit the color scheme you want. Layer and glue the pieces onto a cardboard backing sized to fit your wall space, working from the back of the design forward so overlapping edges sit naturally. A glue stick keeps the paper from wrinkling the way liquid glue can.
Because cardboard flexes, a thin cardboard or foam board frame around the edges keeps the piece from curling off the wall by the end of the semester. A single strip of poster putty in each corner holds the lightweight backing in place, and it comes off without leaving a mark on painted drywall or sealed cinder block.

5. Transfer Photos Onto Scrap Wood Slices
An image transferred onto a wood slice gives a photo a textured, rustic look that a standard print can’t match. Small scraps of wood, whether leftover from a project or picked up cheap at a craft store, work well for this.
Print a mirrored copy of your photo on a laser printer or at a copy shop, then coat the wood surface with a thin, even layer of transfer gel medium. Press the photo face-down onto the wood and smooth out any air bubbles, then let it dry for at least four hours, ideally overnight. Once dry, dampen the paper with a wet cloth and gently rub it away in small circles until the image shows through on the wood.
Wood slices under half an inch thick stay light enough for a single adhesive strip rated for 1 pound. Group three to five slices in a cluster of different sizes rather than mounting one large slice, since spreading the weight across several small pieces keeps each one well within a light-duty strip’s limit.
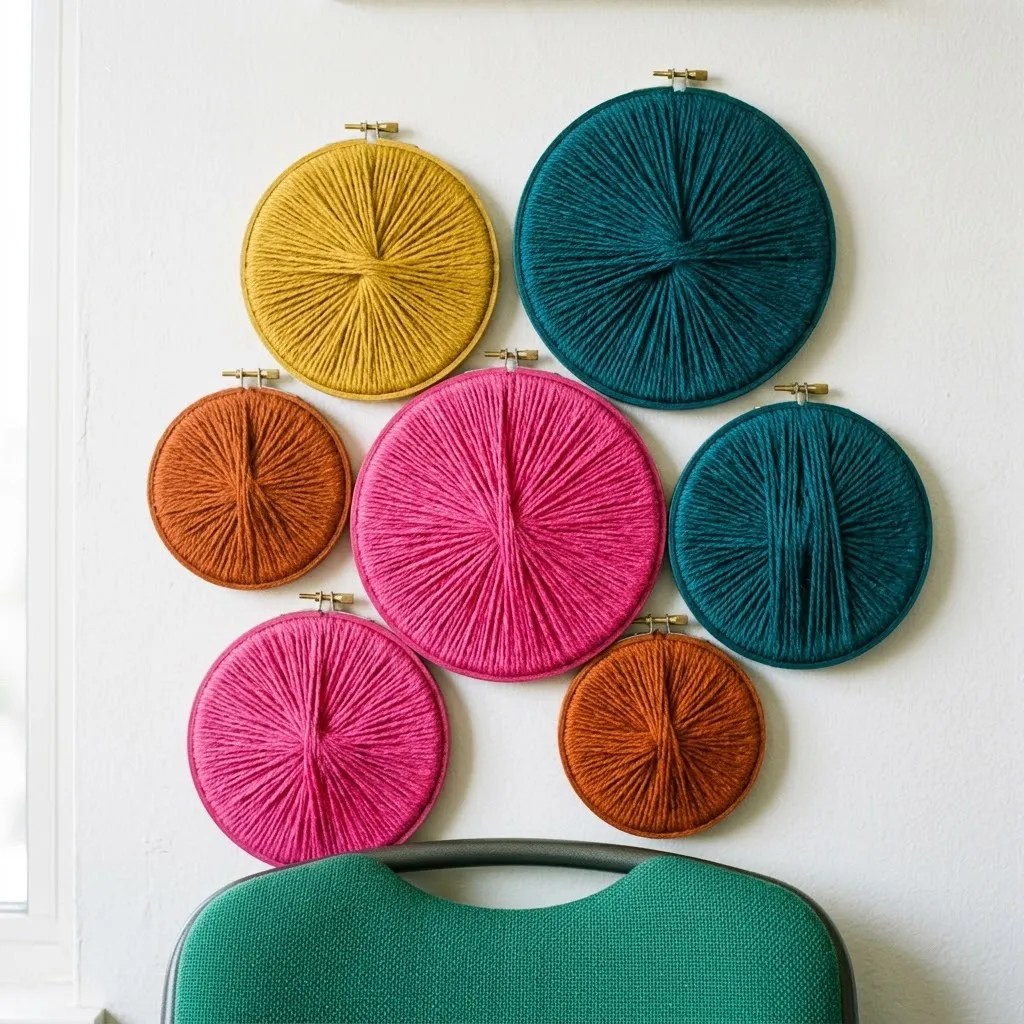
6. Wrap Embroidery Hoops in Yarn for Geometric Wall Shapes
Yarn-wrapped embroidery hoops in a mix of sizes build a soft, colorful wall shape without any painting or cutting involved. Hoops range from about $1 to $3 each at most craft stores, and a single skein of yarn covers several of them.
Separate a hoop into its two rings and set the inner ring aside. Wrap yarn around the outer ring tightly and evenly, overlapping each pass slightly so no bare wood shows through, and secure both ends with a small dot of hot glue. Layer two colors on a single hoop by switching yarn partway around for a two-toned ring.
A small dot of poster putty, or a slim ribbon loop hung from a low-weight strip, is more than enough to hold a finished hoop in place. Because the hoops carry almost no wall risk, this is one of the safest choices for dorms with the strictest no-nail, no-tape policies.

7. Swirl Shaving Cream Into Marbled Paper Art
A sheet of marbled paper looks like something pulled from an art print shop, but the process behind it uses a can of shaving cream and a few drops of color. Framed or matted, the swirled pattern reads as abstract art rather than a craft project.
Spread a thin, even layer of shaving cream across a shallow tray, then drop small dots of food coloring or thinned acrylic paint over the surface. Swirl the colors together with a toothpick or skewer until you get a marbled pattern, then press a sheet of cardstock or watercolor paper flat onto the surface. Lift the paper and scrape the excess shaving cream off with a ruler or old gift card, revealing the marbled design underneath. Let it dry flat for about two hours.
Skip visible adhesive on the front altogether by rolling a small square of painter’s tape sticky-side out and pressing it to the back corners, which holds the lightweight sheet flat against the wall. This method matters most in dorms where the housing office checks for any front-facing tape or putty marks during move-out inspection.

8. Spray-Paint Puzzle Pieces Into a Word or Shape
A used jigsaw puzzle, missing pieces and all, becomes raw material for a textured letter or shape once it gets a coat of paint. The uneven edges of the pieces create a raised, textured surface with real depth, something no flat print can offer.
Trace your chosen letter, initial, or shape onto a piece of cardboard or foam board, then lay puzzle pieces inside the outline until the shape is filled. Glue each piece down with tacky glue and let it set for about an hour. Once dry, spray paint the whole piece in one or two light, even coats, holding the can about 12 inches away and working outdoors or over a drop cloth.
Backing boards under 12×12 inches stay light even with the puzzle pieces glued on, usually under a pound total, so a poster strip at each top corner holds it in place. Puzzle pieces are often sold by the bag at dollar stores or thrift shops, which keeps this one of the cheapest projects on the list if you skip buying a full new puzzle.

9. Arrange Wine Corks Into a Wall Mosaic
Corks saved from home, or a bag of recycled corks from a craft store, turn into a mosaic once they’re arranged into a pattern. A grid, a heart shape, or a single large initial all work well with this technique.
Lay the corks out dry on your backing board first to plan the pattern before any glue goes down, standing them on end or slicing them lengthwise for a flatter profile. Glue each cork in place with hot glue, working in small sections so the glue doesn’t set before you’ve adjusted the spacing. Let the finished piece cure for about 30 minutes before moving it.
A full mosaic of standing corks on a 12×12 inch board can weigh close to a pound once the corks and glue add up, making this one of the heavier projects here. Adhesive strips rated to hold 3 pounds keep it secure, and splitting the load across two strips placed at the top corners spreads the weight evenly instead of relying on one strip to carry it all.

10. Stencil Negative-Space Art With Painter’s Tape and One Spray Can
Cutting a shape out of painter’s tape and spraying over it leaves a crisp, clean silhouette in the color of the board underneath once the tape comes off. The negative-space effect looks more deliberate than a painted shape ever does.
Cut a simple shape from a strip of painter’s tape with a craft knife, then press it firmly onto the center of a poster board or canvas. Mask off the surrounding edges with more tape to catch overspray, then apply the paint in light, even coats from about a foot away, letting each coat dry for 30 minutes before adding the next. Peel the tape away while the paint is still slightly tacky so it lifts clean instead of chipping.
Poster board or canvas backing keeps the finished piece under 2 pounds even at a larger size, so one small strip carries it without trouble. The flat profile also makes this a good fit for narrow wall space above a desk, where anything bulkier would bump into a shelf or lamp.

11. Dip-Dye an Old Sheet Into an Ombre Wall Hanging
An old twin sheet, or a thrifted piece of fabric, covers a large stretch of wall for the price of a box of fabric dye. Dipped in a gradient that fades from deep color at the bottom to white at the top, the finished fabric hides its bedsheet origins completely.
Mix the fabric dye in a bucket following the package instructions, then dip one end of the sheet in and slowly lower more fabric into the dye over 10 to 15 minutes to build the gradient. Rinse the fabric in cold water until it runs clear, then hang it to dry fully, usually about a full day, before displaying it. Once dry, drape the fabric over a tension rod set into a doorway or alcove.
A removable tension curtain rod wedged between two points needs no drilling and holds the fabric’s weight without strain. It comes down in seconds at move-out with no residue left behind, making this one of the fastest projects on the list to take apart when the semester ends.

12. Press Flowers Behind Wax Paper in Dollar-Store Frames
Dried, pressed flowers sealed behind wax paper and slid into a plain frame give a botanical look without the cost of real pressed-flower art. Dollar store frames work well here since the glass usually gets swapped out anyway.
Press flowers flat between the pages of a heavy book for about a week until fully dried. Arrange the pressed flowers between two sheets of wax paper, cover with a thin cloth, and run a warm iron over the top so the wax paper seals shut around them. Trim the sealed sheet down to fit inside a standard frame insert.
With the glass removed and a paper backing swapped in for the original insert, the whole piece comes in light enough for a single small strip to hold without strain. Keeping the total count to three or four framed pieces spread across the wall space avoids putting too much weight on any one section.
Frequently Asked Questions
Can you hang DIY wall art in a dorm without damaging the walls?
Yes. Every project in this guide uses removable methods instead of nails or screws. Adhesive picture-hanging strips, poster putty, and tension rods all hold lightweight, homemade pieces without leaving holes, and each one peels away clean at the end of the year.
What’s the cheapest way to make your own dorm wall art?
The marbled shaving cream paper and the magazine collage cost close to nothing if you already have magazines and a can of shaving cream on hand. Both projects lean on materials you likely already own, or ones that cost under $3 total to pick up.
How do you keep homemade wall art secure on cinder block walls?
Cinder block holds adhesive less evenly than smooth drywall, so lighter projects hold up best. Stick to pieces under a pound where you can, clean the block surface before applying any strip or putty, and spread heavier projects like the cork mosaic across two strips instead of one to keep the load even.
How much does it typically cost to make dorm wall art yourself?
Most projects in this guide run $3 to $15 depending on materials. Paint sample pots, embroidery hoops, and dollar store frames sit at the lower end, while a full fabric dye wall hanging lands closer to $15.
Do you need craft experience to make any of these?
No. Every project uses basic techniques like taping, gluing, or dipping, and none require special tools beyond scissors, a glue gun, or a paintbrush. If you can wrap yarn around a hoop or press flowers in a book, you can finish any project on this list.
Is tape allowed directly on dorm walls?
It depends on the school. Washi tape and painter’s tape are removable and generally allowed, but some housing offices restrict any tape on painted surfaces regardless of type. Check your dorm’s decorating policy before applying tape directly to a wall, and test a small strip in a hidden spot first to confirm it lifts off cleanly.


